

In baseball, the position you play changes what you need from a cleat. A pitcher drags a toe, a catcher crouches, and an outfielder covers ground. We design around those differences.
The shape around the foot matters too. A plate chosen for your position still needs a cleat that fits your forefoot, heel and instep.
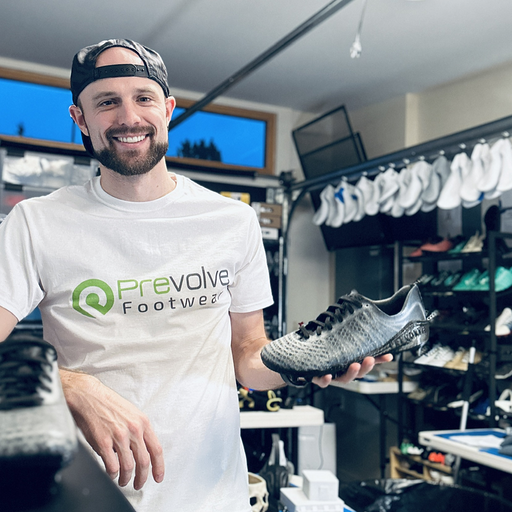
I’ve been designing and 3D printing cleats for most of the last decade, and I have wide feet, which is how I got into this. I play soccer, not baseball, so the mound details in this post come from the pitcher we built them with, not from me.
That pitcher is Travis Kuhn. We worked with him to build a cleat around his foot and the demands of pitching. More than a year of feedback and revisions is behind the design decisions in this post.

SHOP CUSTOM FIT BASEBALL CLEATS
Fit starts with the foot
Players at the same shoe length can have very different widths. A large foot-scan study illustrates that variation. The manufacturing background is in Why Wide Cleats Are Hard to Find.
For baseball, the practical point is to check the forefoot, heel and toe-box shape together. A larger size may add unwanted length, while a wide label doesn’t tell you which parts of the cleat changed.
Pitchers: one foot drives, the other one stops
A pitch uses both feet in sequence. In 1998 a Johns Hopkins group put force plates under both feet of seven pitchers and found they pushed with about 0.35 body weight off the back leg and resisted about 0.72 body weight with the landing leg, with wrist velocity tracking leg drive. Seven pitchers in one lab, so treat the numbers as a picture rather than a rule. The back foot drives; the landing foot braces as the pitcher follows through.
The back foot pushes and then drags. On the drag the shoe is up on its toe and the top of the toe box is the contact surface. That is why pitcher plates carry a toe guard, and why the guard is the part we’ve revised most. Ours got a little thinner, and it now runs back toward the midfoot for more coverage. We held off on extending it at first because we assumed a guard reaching that far back would stiffen the forefoot where it needs to bend. It turned out not to matter, so the guard got longer.
On the landing side, we worked on heel stability and the way the plate bends. The pitcher design uses a three-stud heel and a diagonal bar across the midfoot.
We also re-angled the forefoot studs more perpendicular to the foot, to address the landing step, and moved the center forefoot stud to metal. None of that came out of a lab. The first pair had the spikes oriented the wrong way on the left foot, and the gap between the heel spike and the edge of the foot was wide enough that Travis slipped on a couple of landings and went back to his old cleats for a bullpen until the next pair arrived.
Describing the return to his old cleats, Travis wrote: "I felt SO much less stable and anchored. The heel lift is so much more apparent and I don't feel nearly as locked in when not wearing our spikes."
The next pair fixed the spike orientation, moved the heel studs and stiffened the internal plate. The pair after that added cushion, because for a pitcher rehabbing a shoulder the priority was, in his words, "not only prioritizing performance, but also day to day recovery."
His verdict on the current build: "by far the most comfortable pair we've had." A subsequent message asked for the heel studs a touch closer to the edge. His feedback continues to guide the next revision.

Catchers: forefoot flex in the crouch
A catcher spends two hours folded up with their toe joints near the end of their range, then stands and throws to second. That position makes forefoot flex an important part of the design discussion.
You need control through a demanding position, then the ability to get up and move. I want the cleat and the training to work toward that same goal.
I don't choose the softest plate by default. Forefoot movement, the structure around it and the studs all need to suit the crouch and the playing surface. That is a design problem I take seriously.
Infield: metal, and the price of grip
Metal earns its place on packed dirt. A molded stud sits on a hard infield, a metal blade cuts into it, and the difference shows up on the first step to your glove side. Two other changes came from watching infielders and hitters: wider heel studs, to change the platform under the heel, and a raised plate edge.
Grip and release both matter. Research on cutting movements shows that changing rotational traction changes joint loading. I use that as a reason to consider the whole movement, rather than choosing studs only by how much they grip.
A Duke lab ran 36 athletes through cutting movements in four plate configurations and found different forefoot loading patterns. The configuration can change the pressure distribution. I explain how we approach the layout in the stud placement article.
Outfield: it is a sprint sport out there
An outfielder's game is long straight-line running with a hard stop at the end, on grass one day and turf the next. Weight has a known cost: every 100 grams added per shoe costs roughly 1% of running economy, in the running conditions studied. That is one reason I pay attention to weight as well as traction in an outfield build. Stud length should match the surface you play on, not the surface on the box; check the intended surface for the plate you are considering.
Train the foot as part of the player
A throw involves far more than the arm, and I believe training should reflect that. The feet are part of how the player sets up, drives and lands. I want strength and control there, just as I want them in the rest of the body.
A study of 138 baseball players found impaired foot function more often among players with shoulder or elbow pain. That is an association, not a demonstration that foot training treats arm injuries. I don’t want to leave part of the athlete untrained. The foot function article develops that argument.
Our foot strength level guide turns that belief into a progression. We work on the foot while building a cleat around the player.
How we build for your position
You scan both feet with your phone, which takes about two minutes (the process is on the foot scanning page). We take your position, weight and foot strength level, and the design algorithm builds a last, a toe box, a stud layout and a plate stiffness from that. Printing to order lets us incorporate revisions as the design develops.

Plates: seven-stud and five-stud metal blade, a dedicated pitcher plate, FG bladed for grass, and an indoor turf sole. Position-specific stiffness is real here rather than a sticker on the box: the internal insole plate and the stud wall thickness are set from your weight and foot strength.
The baseball cleat product page lists current prices and plate options. Toe spacers and metpad insoles are also available. The FAQ explains the current fitting process and guarantee terms.
Player feedback helps us identify wear patterns and decide what to revise next.
If you are buying off the shelf this season
Custom is not the right call for everybody, and a kid who will grow two sizes by spring is a fine reason to buy retail. What I’d do in the store:
- Inspect the plate. Compare the wide and standard versions to see which dimensions change.
- Compare the shape. Look at toe-box taper, heel fit and forefoot room together. A width label can’t describe all three.
- Compare flex. Bend the forefoot gently to compare models. A hand check is a comparison, not a measurement of how the cleat will behave in play.
- Buy the plate for the surface you play on most, not the one you see twice a year.
- Pitchers, check coverage and flex separately. A longer toe guard adds coverage. The construction determines how much it changes forefoot movement.
- Try them on late in the day, in game socks. Feet swell, and a store floor is not a mound.
Choose a cleat for the work your position requires, then check the fit of the whole shoe. The sole and the shape around your foot both deserve attention.
The pitcher development work is one example of how we do that: build, listen to the player, and revise the next pair.