
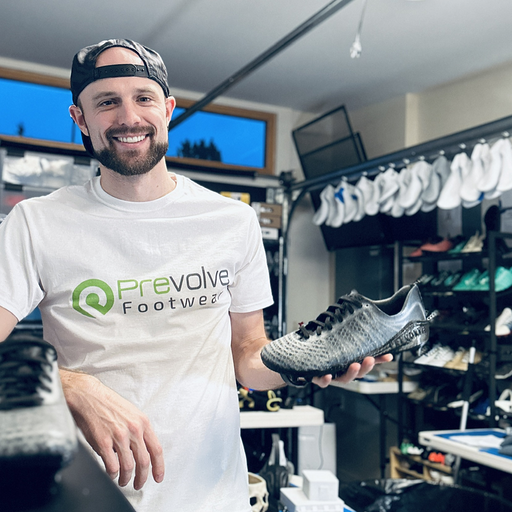

If your cleats feel tight, you've probably heard the advice to give them a few sessions to break in. I heard it throughout my playing life, and I believed it for about fifteen years.
Some materials soften with wear, but that doesn't tell you whether the cleat is the right shape for your foot.
I’ve played soccer for 25 years and I design cleats for a living. I also sell them, and I’d still rather you play in a cleat that fits than in one of mine that doesn’t. This post is written so you can tell the difference.
Here, I'll walk through five areas to check when you try on a cleat: the toe box, forefoot width, midfoot, heel and insole. The broader discussion is in Will Better Cleats Make You a Better Player?

Comfort is not the soft option
I don't think discomfort is the price of a serious soccer cleat. A cleat should hold your foot securely and let you play without constantly thinking about what hurts. That's the standard I design toward.
The useful research question is how a cleat feels late in the match. In a 90-minute simulation with eleven players, discomfort increased in both cleats tested; the higher-pressure cleat was also the one in which jump power fell. That matters to me because I want a cleat that still feels good when the player is tired.
1. Toe box
At the front of the cleat, toe-box shape affects both room and ball contact. A pointed shape can feel familiar to a soccer player. It also looks fast, which I can't hold against anyone. The question is whether it leaves enough room for your toes.
A tapered shape can leave too little room for some players. I grew a bunion on my right foot while playing in youth cleats, so toe room is something I pay close attention to.

The objection I get most is about touch, and it is fair. My answer after years in both shapes: a wider box makes a few touches slightly harder and a few slightly easier, and after a couple of weeks of training in it you stop noticing. Most of your touch comes off the tip and the inside edge anyway, so if the tip shape is right, the width behind it matters less than you would think.
We use your scan and toe photos to shape the toe box, then adjust it for soccer. I'm looking for room at the toes without leaving the foot sliding inside the cleat.
We also discuss toe spacers and toe socks as part of the fitting and training process. They are options to consider alongside fit, not a substitute for it.
Thickness is a trade. A thin upper lets you feel the ball, which matters most on small touches at speed, and a review of the Essen lab's soccer shoe studies reports thinner uppers giving better ball feel. Thicker material adds cushion and a slightly more consistent strike, and takes some of that feel away.
The part we spend most time on is texture. Leather grips a ball; a smooth printed surface doesn’t. So we print a raised texture across the contact zones, and we’ve tuned it more than any other part of the cleat: how far out it reaches, how deep it sits, how the edges are shaped so nothing peels. The tongue is printed a hair thicker than it used to be, purely because laces press on it.
2. Forefoot width
A width problem may become more noticeable as a match goes on. Pay attention to where pressure builds, rather than judging the fit only in the shop.
Twenty-one experienced players had pressure sensors put inside their cleats for four soccer movements. Cutting loaded the medial side of the foot. Sprinting loaded the first and second rays, the long bones behind your big toe and second toe. Kicking loaded the lateral side. All of them ran higher than normal running, and the authors' conclusion was about volume: high load repeated often is how overuse injuries start.
Look for where the cleat narrows across the ball of your foot and where pressure concentrates beneath it.

I also compare the forefoot with the plate beneath it. If the shapes don't match, I want to understand how the foot moves inside the cleat during a cut.
Across 1.2 million scanned feet, people wearing the same length vary by about 16 mm in width, and the paper estimated that a single stock width could fit at most 40% of the feet in a length class. That variation is why length alone can’t describe fit.
3. Midfoot
This is the section under your laces. When you change direction, your foot presses hard into the outer wall here. If that wall stretches, force you meant to put into the ground goes into deforming your own shoe instead, and the shoe moves as you push off.
Most of the fix lives in boring places. Our eyelets are angled to line up with the throat so lace tension spreads instead of pinching, and the top two carry a second row of reinforcement because that is where people pull hardest. We have also tested that construction on the bench.
4. Heel
Your heel should stay securely seated when you plant your foot. That's why we pay attention to the shape and stiffness of the heel counter.

A heel counter has to do two jobs that fight each other: hold rigidly, and not dig in. Ours has been through a long list of small revisions for that reason. We raised it to change how it holds the rearfoot. Corners and transitions got smoothed, because sharp geometry becomes a pressure point over 90 minutes. Vertical channels went in at the bottom edge so sweat drains instead of pooling. Feedback from a customer with narrow heels led us to shift the counter laterally. We can now adjust that position for other customers with similar heels.
5. Insole
The insole is the most ignored part of a cleat and the one your foot touches all game. Cheap ones are slick, so your foot can slide on the surface, and on a hot day the insole itself starts traveling around inside the shoe.
Our insole has a grippy top surface and locks into the plate below it. We adjust the build using your weight and foot strength level. There is a separate explanation of metatarsal pads and how we use them.
The plate also changes how the cleat feels underfoot. For placement, stud shape and playing surfaces, see Soccer Cleat Studs: Why Placement Matters.
Don't rely on break-in to fix the fit
If a cleat keeps rubbing in one area, check the fit there: the heel, toe tips, sides or insole. Don't assume the problem will disappear after a few matches.
These five zones give you a way to describe the problem. Don't just say the cleat feels bad: tell us where it presses, lifts or slides so we can work on the fit.
How the fit gets built from a scan
"Custom" is a worn-out word, so here is what it means in practice. It starts with a 3D foot scan: length, width, instep, heel width and the real shape of your foot instead of a size category. Then photos of your toes, because a scan is poor at the gaps between them and the toe box is built around those gaps. Then your weight, which sets plate stiffness and insole thickness. Then your foot strength level, which sets how much flex you get now rather than how much we think you should have. Then sport and position, for the stud layout and where the plate may bend.
An algorithm generates the rest and it is printed to order in the USA. There is no mold, which is the part that matters most to me: every change ships on the next pair instead of waiting for a tooling cycle.
We use a FitSock to check the shape on your foot before making the cleats. The FAQ explains the current fitting process and guarantee terms.
I also believe the foot deserves its own training. A better-fitting cleat and a stronger foot belong together. Our foot strength level guide and barefoot training article explain how we approach that work.
What a comfortable cleat should feel like
Forget brand tiers. Here is the checklist I’d run in a shop, or in your living room before the return window closes.
- Toe box. Standing up, nothing touches your toe tips and your toes can spread and press down. If your longest toe finds the end, the cleat is short, not "snug".
- Width. If the insole is removable, compare its outline with your foot as an initial fit check. Inspect the outsole separately; the insole doesn’t measure the plate.
- Midfoot. Laced normally, push your foot sideways. You should feel the upper hold, not give.
- Heel. Rise onto your toes. The heel should stay down against the insole.
- Insole. Your foot should not skate on it, and it should not shift when you twist.
- All of it. Notice any pressure, slipping or rubbing during the fitting process, and raise it before playing a match.
You can use this checklist on the cleats you already own. If the same problems keep coming back across different models, a custom fitting process gives us a way to work through them with you.